Category Archives: Hobby Coding

Optimising oil pumps in Factorio [pt1]

The PC game Factorio presents an interesting optimisation problem which I’ve been using to improve my python-thinking: how to optimally lay down structures in the game, with a series of overlapping constraints.

Background

Factorio is a resource management and logistics sandbox game on the PC [https://factorio.com/] which asks the player to place structures which obtain resources, and then process them into increasingly complex products.

One of those products is oil, which is obtained from randomly occuring pools within small areas on the world map:

The brown puddles are oil on the map

The player uses 5 structures to collect and distribute the oil:
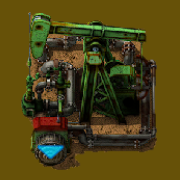
A pumpjack, with the oil connect point at the bottom left

Pumpjacks are placed on the oil, and have 4 possible orientations (the cardinal directions). Oil must be piped from these structures and pipes connect to a single location (which changes for each of the 4 rotations.
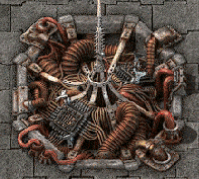
A beacon

Beacons are late-game structures which provide benefits to other structures within a certain range. Without dwelling on the detail, it is desirable to have as many of these covering each pumpjack as possible. They occupy 3 squares, but the beneficial effect stretches a further 3 in each direction, so 9×9 in total (see below for some examples).
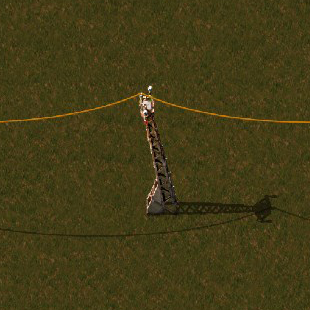
A medium power pole, there are other types with different areas of effect

Power poles are needed to provide electricity to the pumpjacks and beacons. They need to be close enough to each other to be connected to the grid, and they broadcast power in an area around them. There are 4 different kinds, but the concept is the same for each.

Here are some pipes, on the right is a regular overground, which connects to some ‘pipe to ground’ pipes, these create an underground connection.

Pipes (x2) either run above ground, or underground. Oil must be piped away from the oilfield to be useful.

The problem

Given an arbitrary layout of oil on the map, what is the most efficient layout of structures so that:

  1. All oil is pumped
  2. All buildings are powered
  3. All pumpjacks are covered by the largest possible number of beacons

I know of at least one tool which already proposes this, I’m interested in going through the exercise myself, partly to give me a real world problem to practice my Python, and also to see if I can do better!

Part 1: Where to put the Beacons

I want to start backwards, with the purest version of the problem. Given a set of pumps, how do we decide where to put beacons.
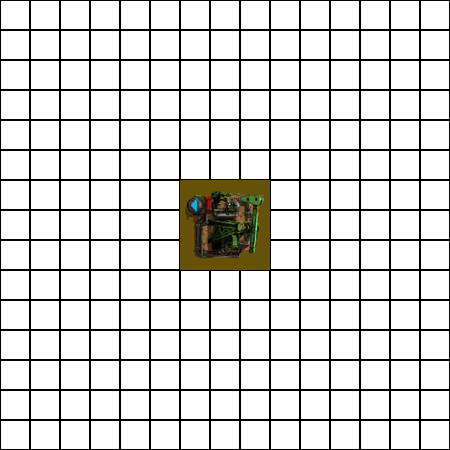
Here is a lone pump, it takes up 3×3 cells
Here are 3 possible beacon placements. 1 and 2 are valid, as long as any of the 9×9 square of influence around the beacon touches the pump, it works. The 3rd placement isn’t valid.

For simplicity, let’s refer to an objects placement by the top leftest square it occupies, so the example above has a pump at location (7,7), and the beacon is at (4,4). In the code, I’ll use arrays, so these locations would be [6,6] and [3,3], starting from the 0 base.

We can then draw out a heatmap of the ‘valid’ placements for the beacon around this single pump
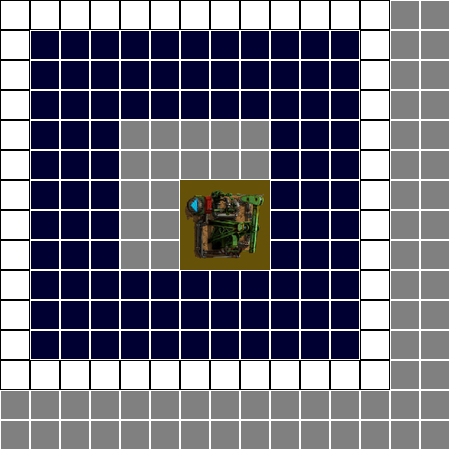
The dark blue cells are the full range of options for placing a beacon which affects the pump. Grey cells are ones where it’s not possible to fit a 3×3 beacon. A beacon would fit in the white cells, but they’re too far from the pump, so have no value.

A beacon placed in any of the blue squares would be a valid placement, because there is only a single pump, there is no difference in the value of each square.
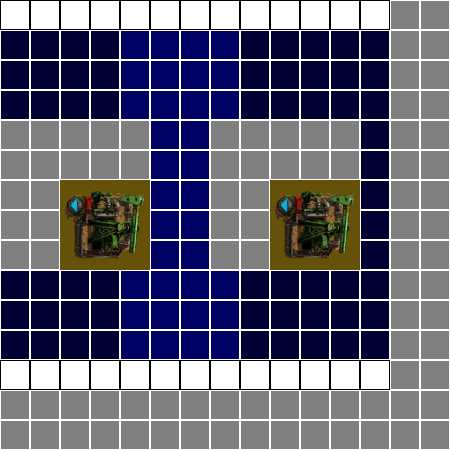
The lighter blue squares show valid placements where the beacon would affect both pumps

Adding a second pump gives a new dimension to the problem, the lighter blue squares are beacons which would affect both the pumps. Our first priority should be to make sure we cover as many of these cells as possible, and, we must avoid ‘blocking’ these more valuable cells by placing a beacon in lower value adjacent cells
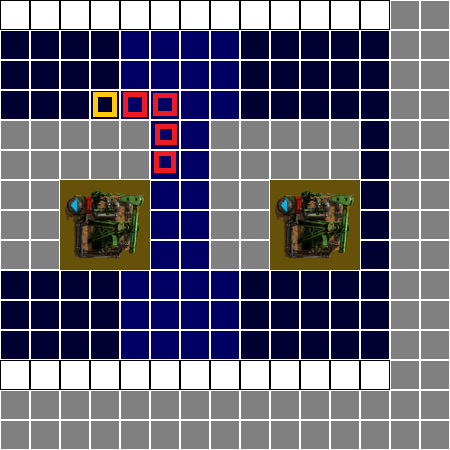
Putting a beacon in the orange cell, which has value 1, would cover 3 other cells of value 2

There’s also a more subtle ‘blocking’ which can occur if a beacon is placed in a high value cell which stops another being available

If we only consider the orange highlighted column, there are 3 unique placements of beacon – Options A and B allow 4 beacons to be placed on valid cells. Option C only allows us to fit 3. By starting in cell 4, we push the 4th beacon into cell 13 which doesn’t have a value

In this example, starting the beacons in cell 4 would reduce the overall coverage by 1. Despite each cell having the same ability to cover both beacons
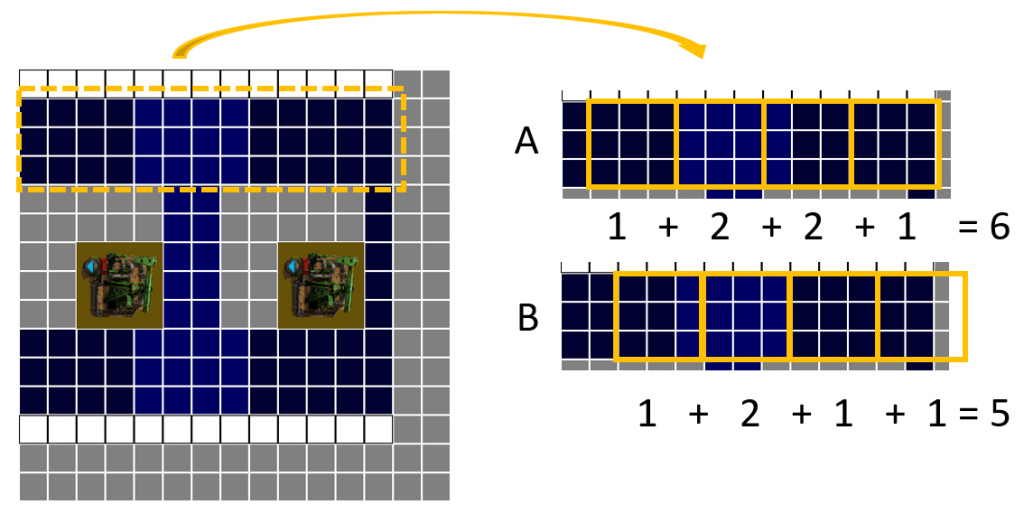
Here both examples allow us to place 4 beacons, but option A allows for two of the beacons to have value 2, whereas option B only allows for 1. Option A is a better global solution

In this example, we can place the same number of beacons.. but.. they may not be as valuable.
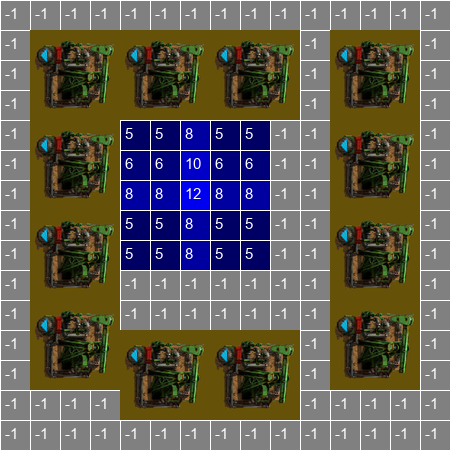
I’ve added numbers to each cell, as the colour wasn’t coping well with this stress situation! Here the central square in the 5×5 grid is worth 12 – a no brainer.. or is it?

In this final example, the central square has value 12, that seems like an obvious place to put a beacon, but it would prevent any other squares being used:

Here 4 beacons have a total value of 22 – 10 higher than selecting the central square alone

A more optimal solution places 4 lower value beacons, which sum to a greater amount

There is a hidden cost of choosing cell, in that it prevents it’s neighbours being used. This could make it less valuable to our overall solution. We need to find a way to discount cells which lead to this blocking.

Assuming we choose to populate the blue square, we cover the orange squares. The black squares are not accessible either. The green squares are the nearest neighbours, which can still be populated.

In order to correctly assess the opportunity cost of any square choice, we need to look at the best combination it enables, minus the best combination it blocks. First we loop through all the ‘cost’ combinations and take the one which gives the highest value

Here are a set of the possible combinations which need to be assessed to make sure we’re doing the right thing by choosing the centre blue square, a simple nested loop will handle the possibilities

Then we loop through the smaller number of green cell combinations which are the possibilities not blocked by the choice of blue square, and take the best combination which is not blocked – the ‘benefit’ of choosing that square

Each purple outline is still possible with the blue square chosen

I’ve then subtracted the highest cost from the highest benefit, and calculate the benefit-cost = Opportunity Cost for each square.

Each cell now has 2 important values:

Top left is the ‘Value‘ of the cell – how many pumps the beacon would be able to influence

Bottom right is the ‘Opportunity Cost‘ – the benefit of the cell, minus the cost. Where the cost is negative, the cell is worth less than the cells it blocks, where it’s positive, the cell provides more benefit than it removes

(A cell can have a bigger positive than it’s own value because of the other squares it enables, I’m not 100% sure that logic works, but I think I can account for that in the implementation)

Now we can loop through the grid, finding the highest Opportunity Benefit square, placing a beacon on it, then recalculating and repeating.

And finally, after all that, here’s what it does:
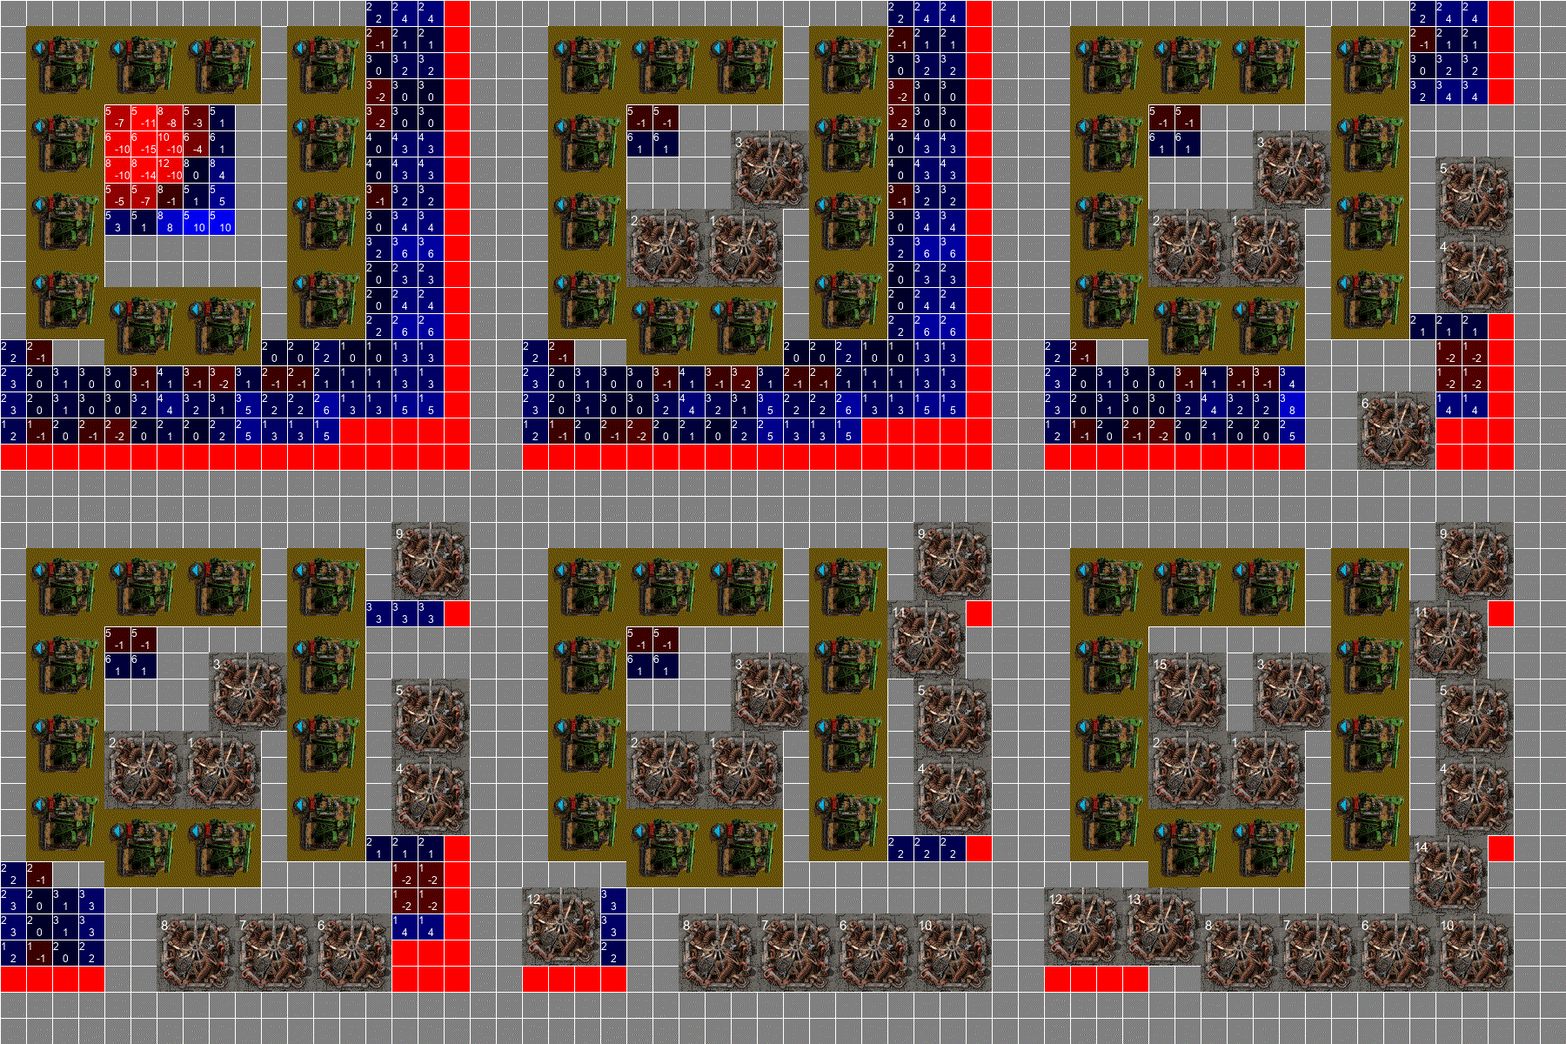
This seems to produce a sensible result, albeit with some odd choices, e.g. where two adjacent cells are equally good, it’s all down to the loop to see which gets chosen

I’m left a bit unsure. The final arrangement has some glitches, like 4,5,9 being offset from 11, 14 – this is due to the way I’m looping through the grid when checking for the best Opp-Benefit. But there’s a general sense that, while my logic feels sound, I’m not able to prove the best-ness of the solution.

Anyway. This is the end of part 1. My next options are either going back and fixing up the code (which I’ll do before I share anything), or moving on to the other constraints.

Some Utility Scripts

I’ve written a couple of bits of code I’ve reused

pickleHelper.py

This simplifies using pickle objects in code

import pickle

def writeToPickle(_pickleName, _object):
        with open(_pickleName, 'wb') as file:
            pickle.dump(_object, file)


def checkPickle(_pickleName):
        try:
            with open(_pickleName,"rb") as file:
                return pickle.load(file)
        except IOError:
            return False


def updatePickleInPlace(_pickleName, _object):
        existing = checkPickle(_pickleName)
        if existing!=False: 
            existing = checkPickle(_pickleName)
            for key, val in _object.items():
                existing[key]=val
            writeToPickle(_pickleName, existing)   
        else:
            writeToPickle(_pickleName, _object)


tadoAuth.py

I’ve replaced a chunk of my home heating system with Tado, this is a simple function to return and store the bearer token for API requests to view and change the settings. It assumes you have TADOUSER/TADOPASS in an environment file.

import requests, json, datetime
from pickleHelper import checkPickle, updatePickleInPlace
from requests.utils import quote
import os 
from dotenv import load_dotenv

load_dotenv()

accessToken = ""
refreshToken = ""
expiresTime = datetime.datetime.now()
pickleFile = "auth.pickle"

def getTadoToken():
    username=os.getenv('TADOUSER')
    password=quote(os.getenv('TADOPASS'), safe='')
    url="https://auth.tado.com/oauth/token?client_id=tado-web-app&grant_type=password&scope=home.user&username="+str(username)+"&password="+password+"&client_secret=wZaRN7rpjn3FoNyF5IFuxg9uMzYJcvOoQ8QWiIqS3hfk6gLhVlG57j5YNoZL2Rtc"
 #Don't worry, this isn't my secret!
    response = requests.post(url)
    accessToken=response.json()["access_token"]
    refreshToken=response.json()["refresh_token"]
    expiresTime=datetime.datetime.now() + datetime.timedelta(seconds=response.json()["expires_in"])
    updatePickleInPlace(pickleFile, {"accessToken":accessToken, "refreshToken":refreshToken, "expiresTime":expiresTime})
    return accessToken

def returnTadoToken():
    depickle = checkPickle(pickleFile)
    if (depickle==False):
        return  getTadoToken()
    if (datetime.datetime.now() > depickle["expiresTime"]):
        return  getTadoToken()
    else:
        return depickle["accessToken"]

picStitcher – creating a photo collage

Every month since our son was born, my wife and I have made a 4×4 collage of the best photos of him which goes on the fridge.

We’ve then taken a photo of the photos, but the quality is obviously not as good as if we’d joined the originals together. Rather than rely on photo editing software, or an online tool, I thought I’d see how easy it is to make a tool for this in Python.

The problem

16 photos per month, saved in jpg format, need to be stitched together in a single jpg

A schematic showing 16 individual images, then those images in a grid, finally those files joined as 1

The photos are all portrait, and I want to preserve the original order from the fridge

The solution

I think the steps are:

  1. Rename the files into some kind of sequence (I wonder if I could enhance this with some image recognition eventually?)
  2. Create a new blank image to hold them
  3. Loop through the files and add them to the blank image at the right offset
  4. Save the new file

1. Rename the files

This turned out to be the most tedious bit of the job. I went through a folder of all the fridge photo jpgs from the year and renamed them as

MMM-Y-X.jpg

a list of properly formatted file names

where x and y are the grid co-ordinates, from 1 to 4. With that done, next stop VSCode

2. Create a blank image

I’ve used the Pillow library a few times, it’s pretty accommodating, and we’ll enough used that stackoverflow produces plenty of help when it breaks (or you do it wrong).

from PIL import Image, ImageDraw, ImageOps

The first thing to do is make a new image, which takes 2 arguments. The first is the colour space for the image, then the width and height in a tuple.

Image.new(mode, size, color=0)

rather than worrying about how many pixels each photo was, I thought it was easier to open the first photo for each grid and read in the width and height values.

#All the files are named MON-Y-X.jpg
month = "NOV"
gridX = 4
gridY = 4

#build the image name
imageName = month+"-1-1.jpg"
#open the file
firstImage = Image.open(imageName)
#check the orientation is correct
firstImage = ImageOps.exif_transpose(firstImage)
#get the size of the image
imageWidth, imageHeight = firstImage.size

then the new image is just the number of tiled images multiplied by the size of each one

#make a new image which is large enough to fit the sub-images in
newImage = Image.new('RGB', (imageWidth*gridX, imageHeight*gridY))

3. Stitch them all together

I’m still second guessing myself in Python when it comes to loops. I’ve read a lot of very stuffy views on the unsuitability of looping (“It’s just not Pythonic” stuff) but I think this is one of the correct uses (small volumes, speed not a factor, readability important)

#loop through, opening each image and pasting it into the new image
for x in range(gridX):
    for y in range(gridY):
        getImageName= month+"-"+str(y+1)+"-"+str(x+1)+".jpg"
        getImage = Image.open(getImageName)
        getImage=ImageOps.exif_transpose(getImage)
        #force a resize, just in case
        getImage = getImage.resize((imageWidth,imageHeight), Image.ANTIALIAS)
        
        #paste into the new image
        newImage.paste(getImage,(imageWidth*x,imageHeight*y))
        #quick debug print
        print(getImageName+ " done")

3b. Don’t make assumptions

I’ve put a couple of bits of code in there which weren’t in the original plan, but address issues I got to when I ran the code

firstImage = ImageOps.exif_transpose(firstImage)

This solved a couple of the pictures having the wrong orientation. I think the issue is that somewhere in the history of images and cameras there was a bifurcation of reason which lead to us having some image files orientated correctly, and others arbitrarily, but with a note to tell the software how to rotate it. Seems crazy to me.

getImage = getImage.resize((imageWidth,imageHeight), Image.ANTIALIAS)

This just ensures the image I’m going to tile isn’t an unusual size

4. Save the file

newImage = newImage.resize((6000,8000), Image.ANTIALIAS)

#Save the new image with the month name
newImage.save(month+".jpg")

I didn’t initially worry about the final image size, but google photos had a freak-out when I tried to upload a 25mb enormous jpg, so sorting the size before saving helped

The result

a (blurry) sample of the output

I’m not sure if it beats the time spent vs time saved heuristic, but I’m pleased with the result!